# Admin Portal
# Accessing Admin Portal
# Enki Cloud
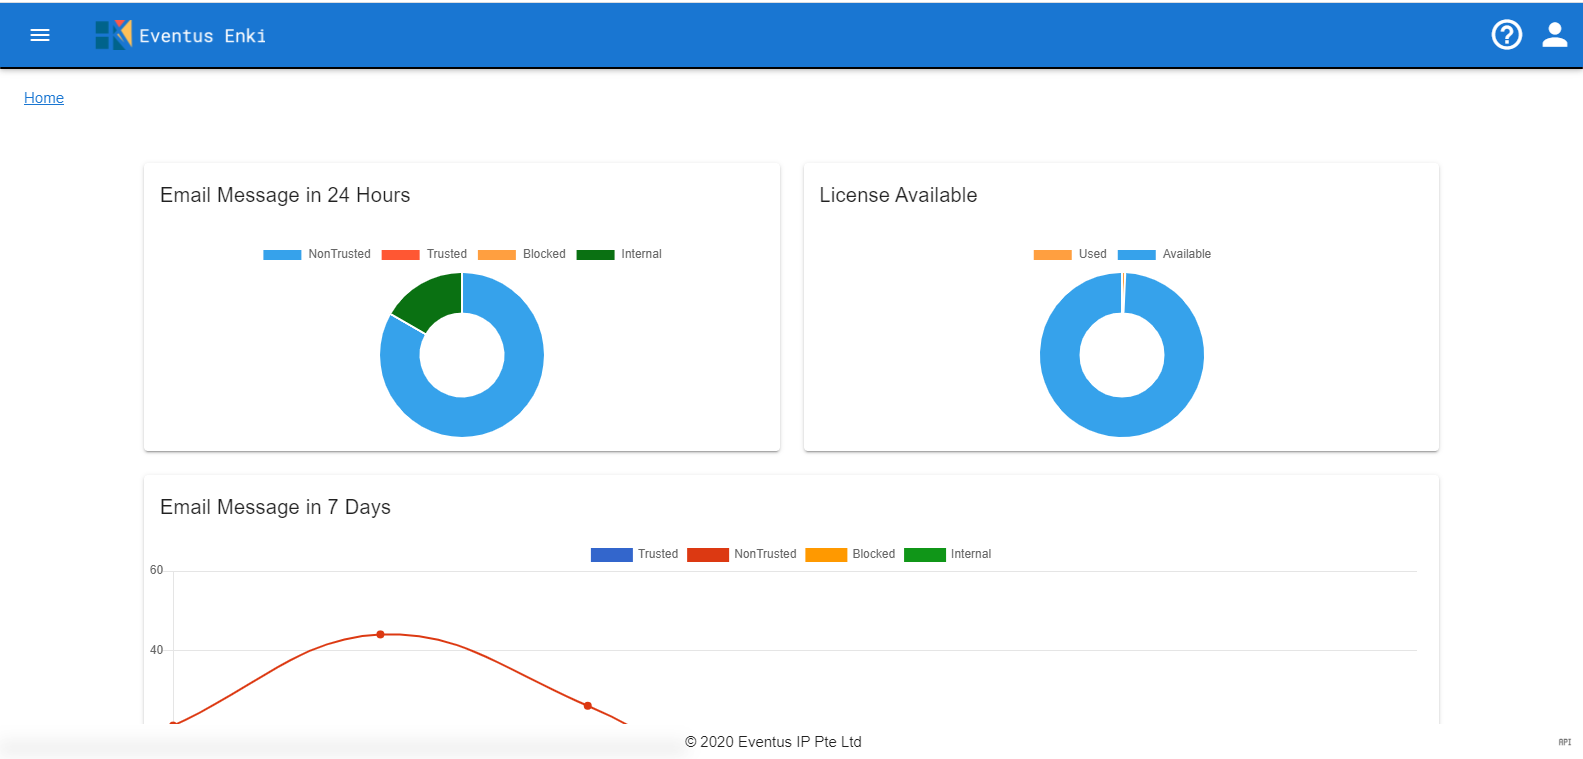
For cloud-based customer, please access the console https://app.eventusenki.com (opens new window) and login with supplied admin credentials
# Enki Server
For on-prem customer, please access the console https://server:port and login with supplied admin credentials
# Mail/Domain Management
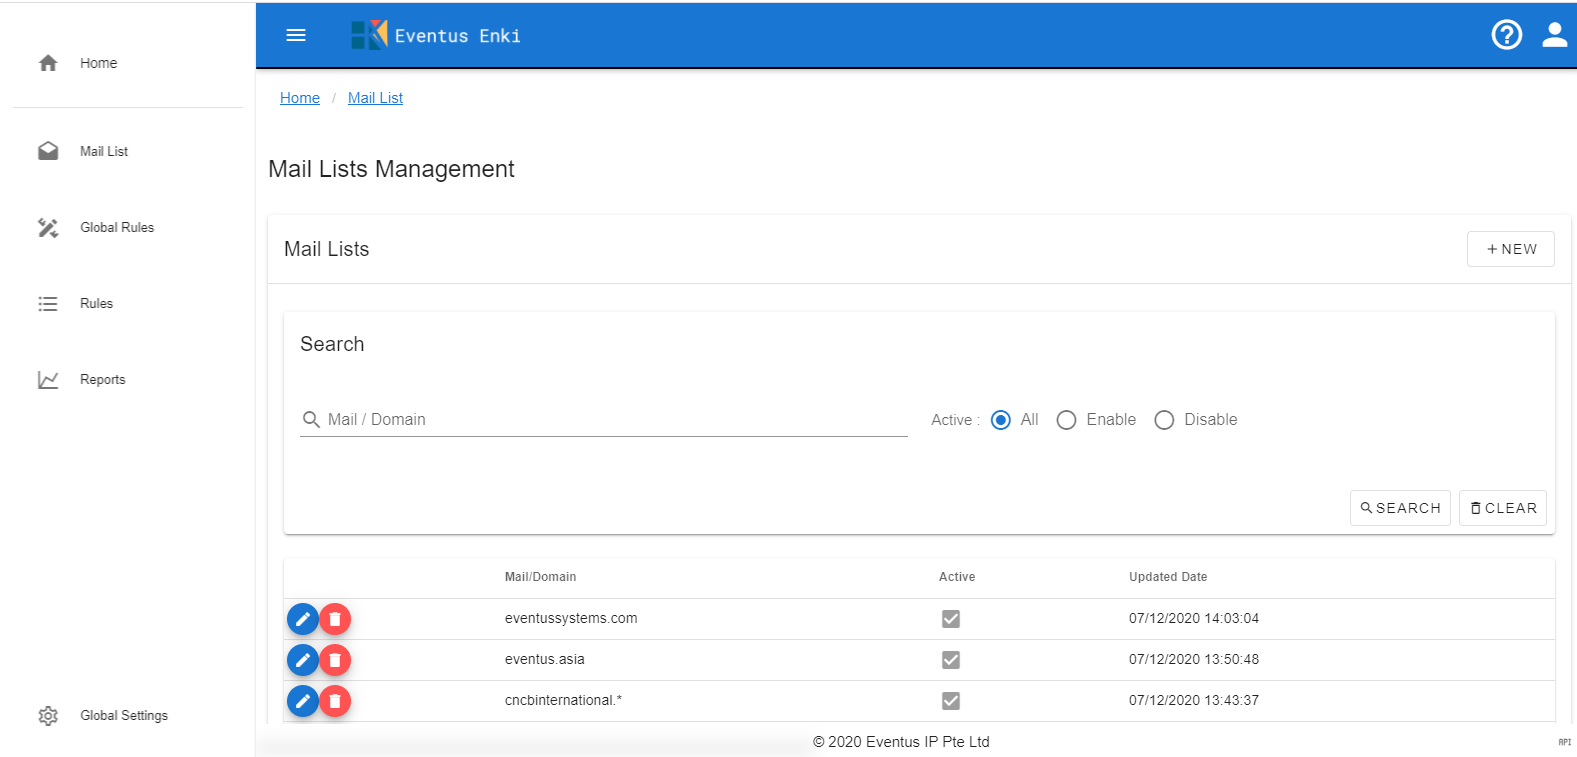
This function is for setting specific email and domain for outlook checking.
1. List Mail/Domain Lists
1. Go to the Mail/Domain Management
2. Fill "Mail/Domain" or choose "Active" status and click Search button to get the lists.
2. Create New Mail/Domain
1. Go to the Mail/Domain Management
2. Click +NEW to create a new Mail/Domain
3. Fill the "Mail/Domain" and switch "Enable" or "Disable"
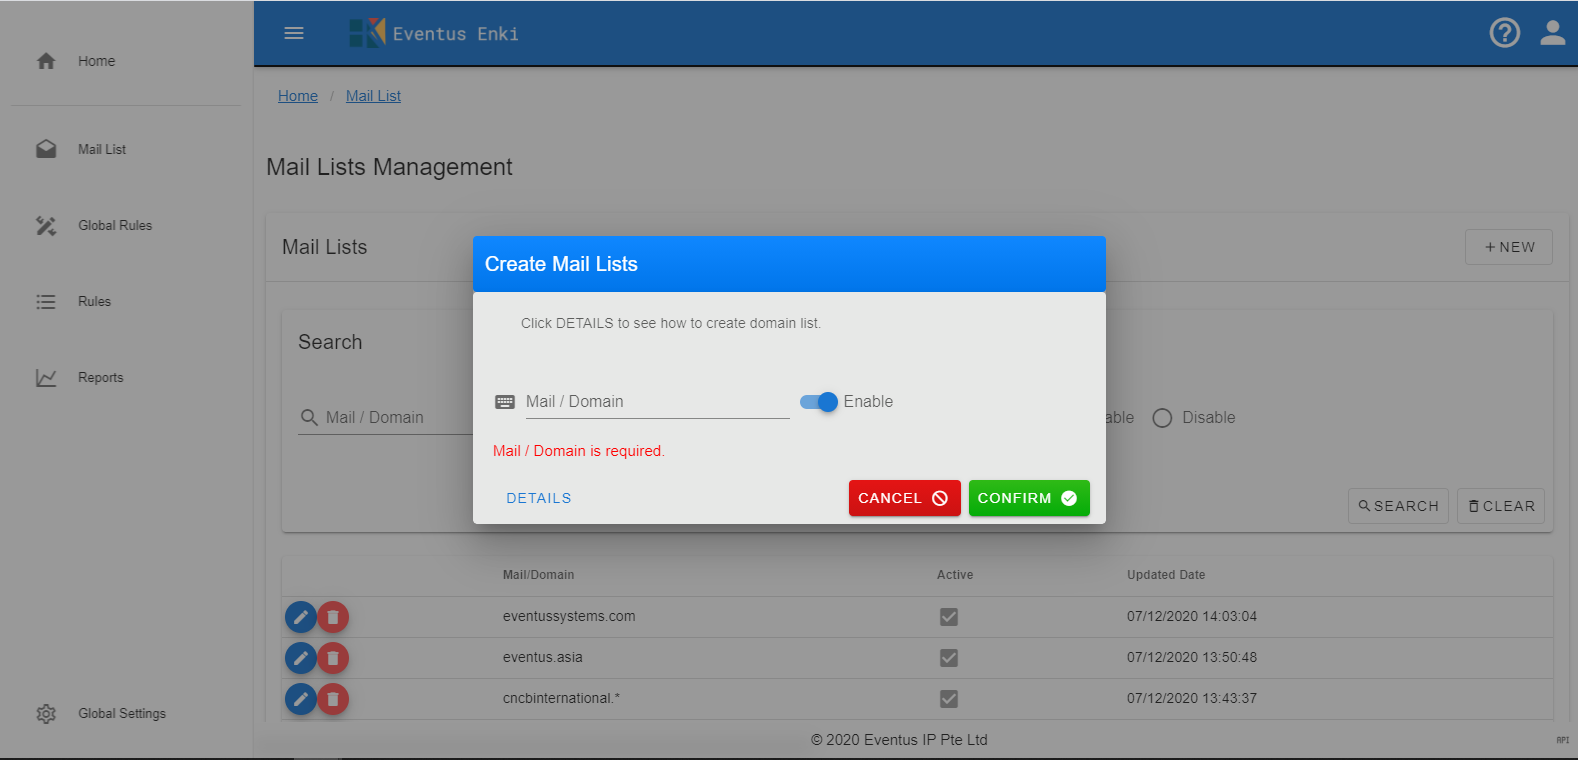
4. Click Confirm to add record
Click Cancel to discard change and go back to list
3. Modify Mail/Domain
1. Go to the Mail/Domain Management
2. Click Pen icon on the record you want to modify
3. Change the "Mail/Domain" or switch "Enable" or "Disable"
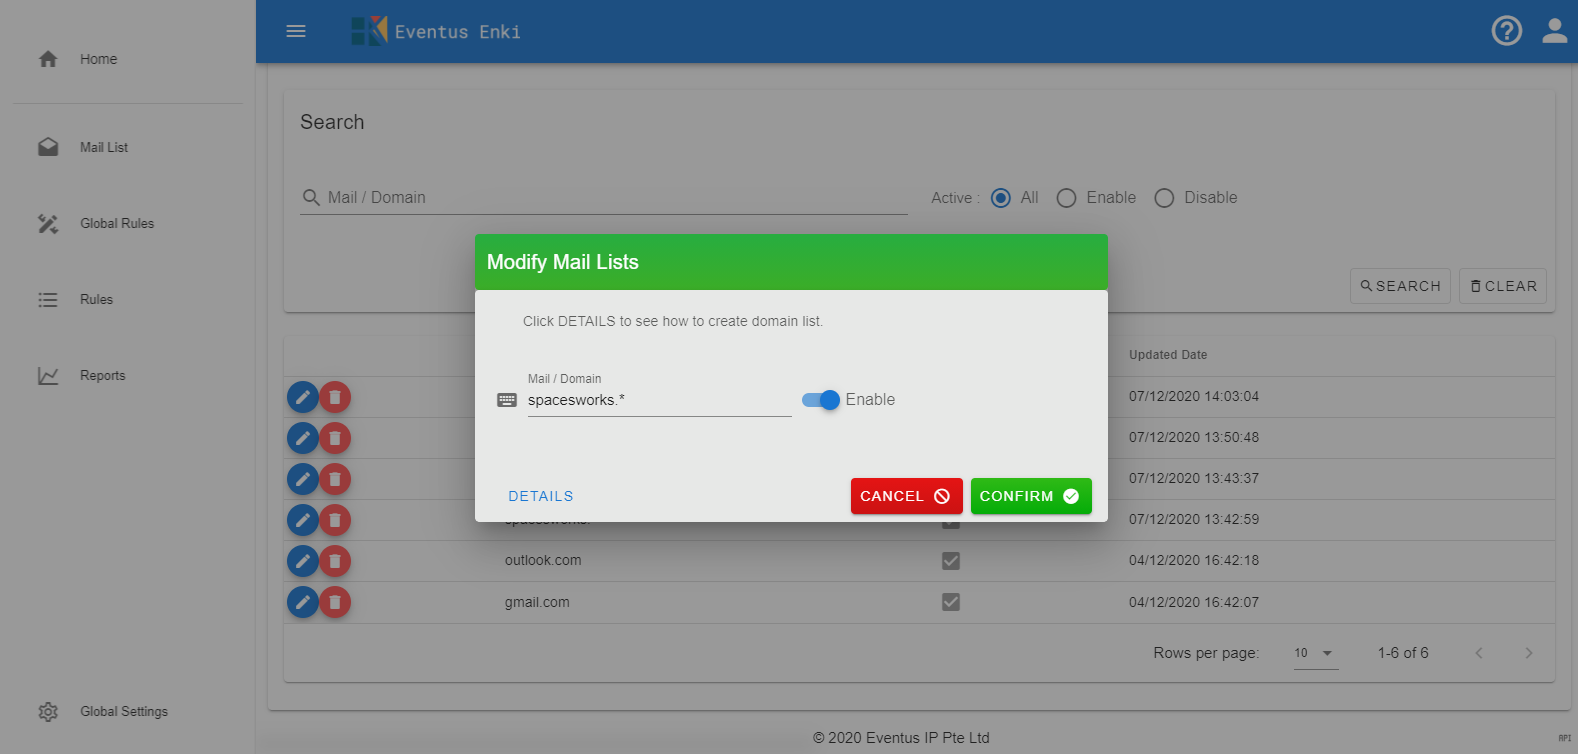
4. Click Confirm to modify
Click Cancel to discard change and go back to list
4. Delete Mail/Domain
1. Go to the Mail/Domain Management
2. Click Trash can icon on the record you want to delete
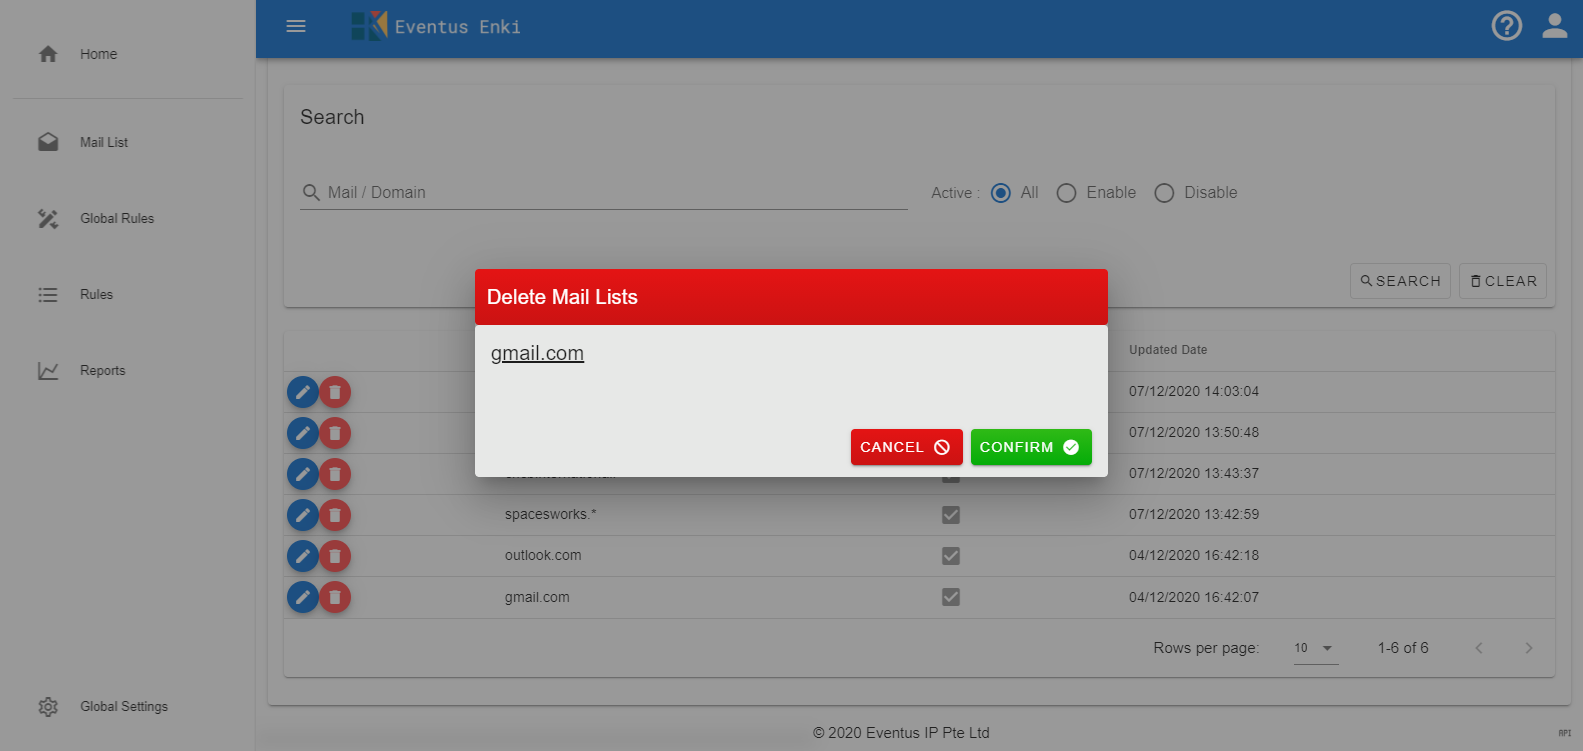
3. Click Confirm to delete
Click Cancel to discard change and go back to list
# Global Rule
This function is for setting global rule. The rules will check when Outlook mail receiver include the mails or domains.
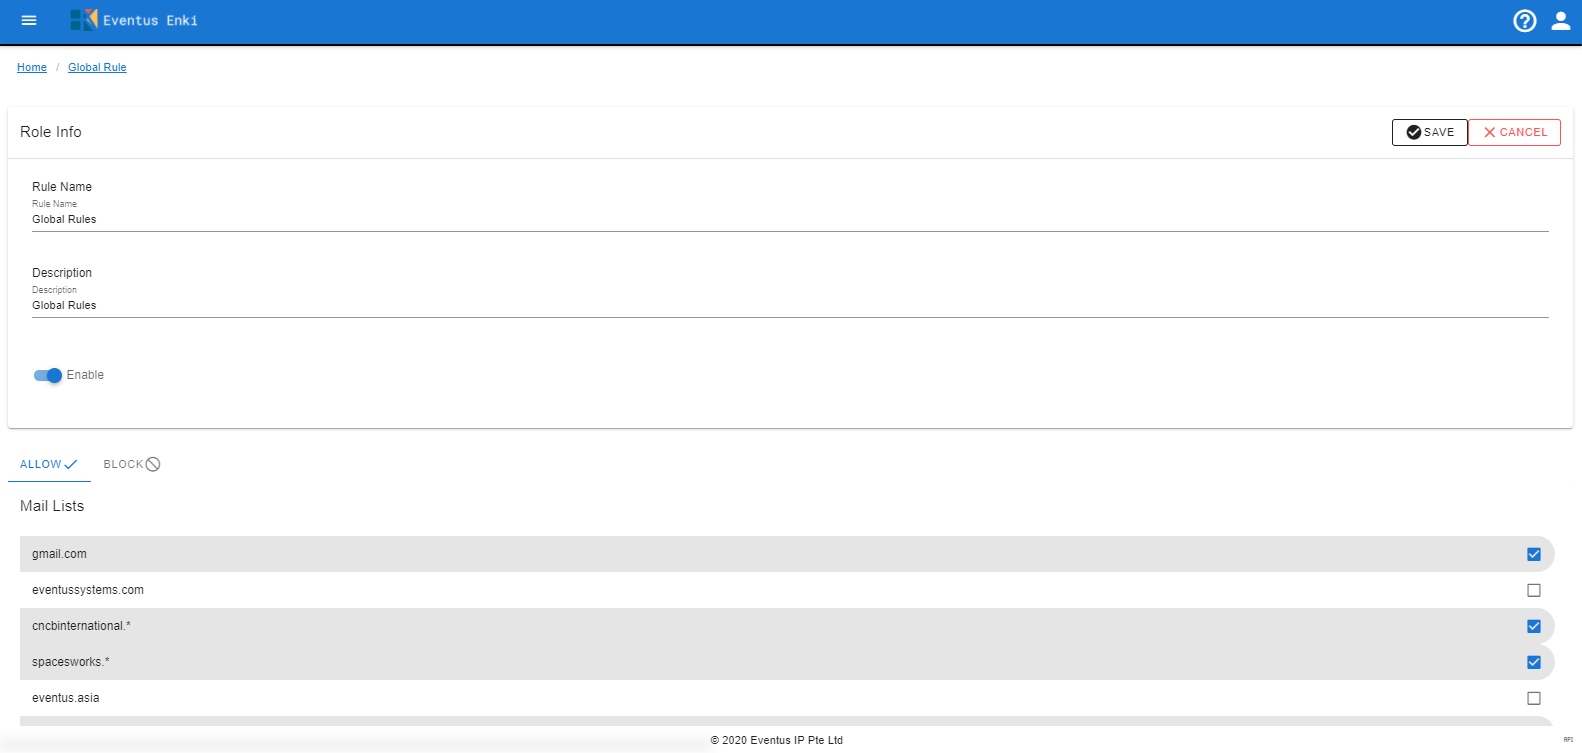
1. Modify Global Rule
1. Go to the Global Rule
2. Change the "Rule Name", "Rule Description", "Actions" and switch "Enable" or "Disable"
3. Switch Allow/Block tab and choose Mail Lists
4. Click Save to modify record
Click Cancel to discard changes
# Rules Management
This function is for setting rule. You can select multiple domains or mails for Block or Pass.
The rules will check when Outlook mail receiver include the mails or domains.
Must have one group selected in Inculde Group list.
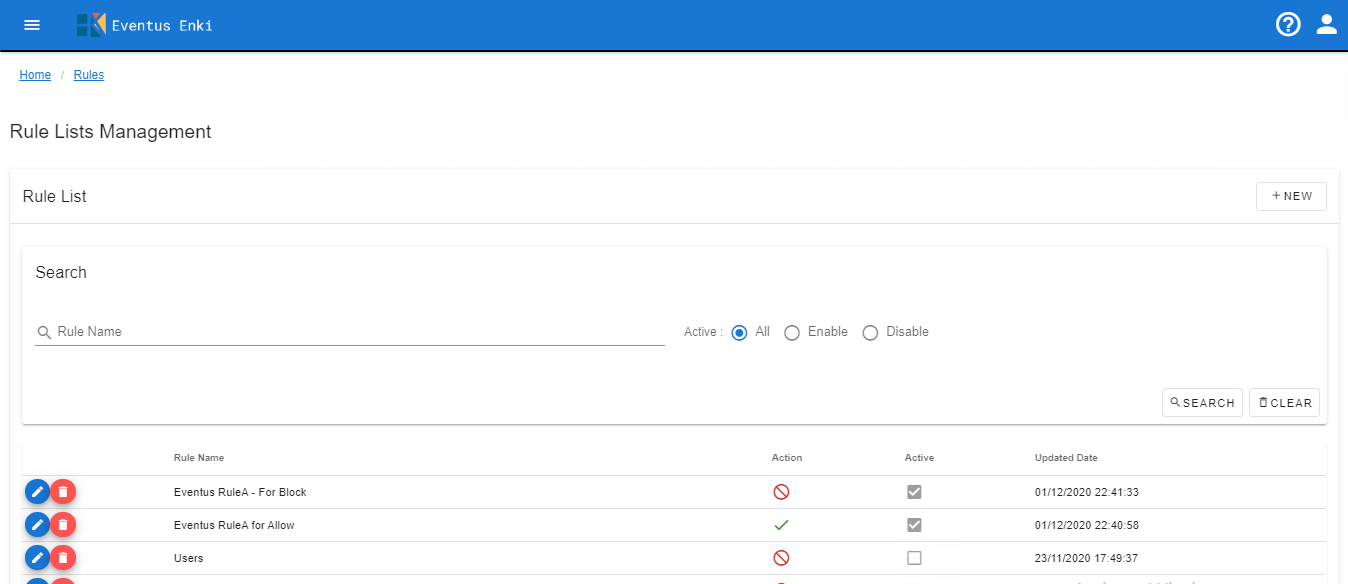
1. List Rules
1. Go to the Rule Management
2. Fill “Rule Name” or choose “Active” status and click Search button to get the lists.
2. Create New Rule
1. Go to the Rule Management
2. Click +NEW to create a new rule
3. Fill the “Rule Name”, “Rule Description”, “Actions” and switch “Enable” or “Disable”
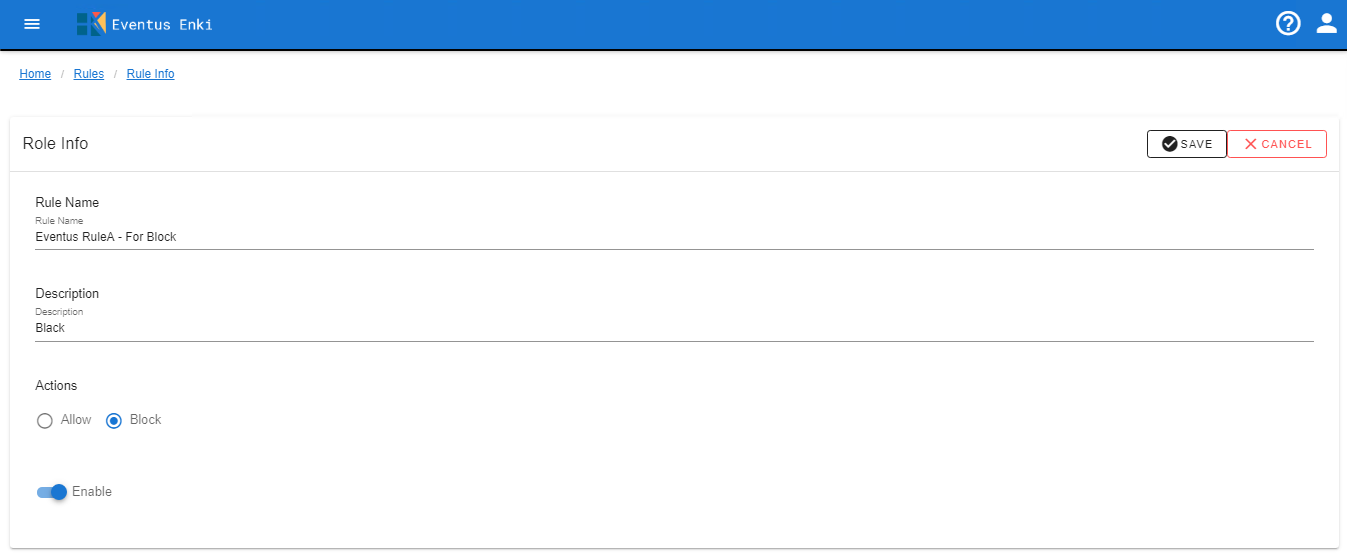
4. Choose Include Group *required
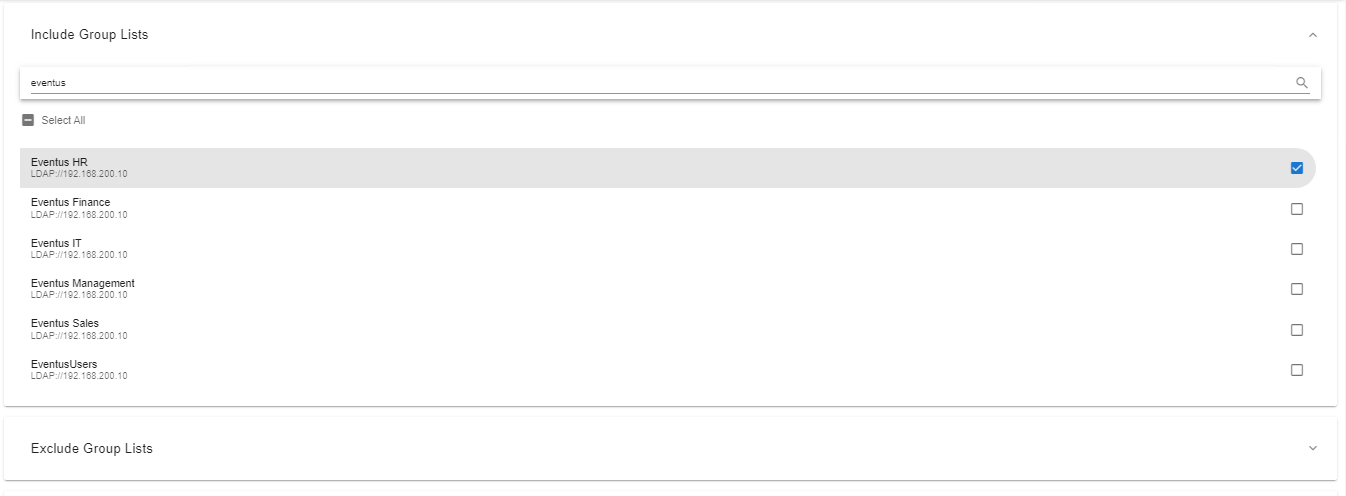
5. Choose Exclude Group
6. Choose Mail Lists
7. Click Save to add record
Click Cancel to discard change and go back to list
3. Modify Rule
1. Go to the Rule Management
2. Click Pen icon on the record you want to modify
3. Change the “Rule Name”, “Rule Description”, “Actions” and switch “Enable” or “Disable”
4. Choose Include Group *required
5. Choose Exclude Group
6. Choose Mail Lists
7. Click Save to add record
Click Cancel to discard change and go back to list
4. Delete Mail/Domain
1. Go to the Rule Management
2. Click Trash can icon on the record you want to delete
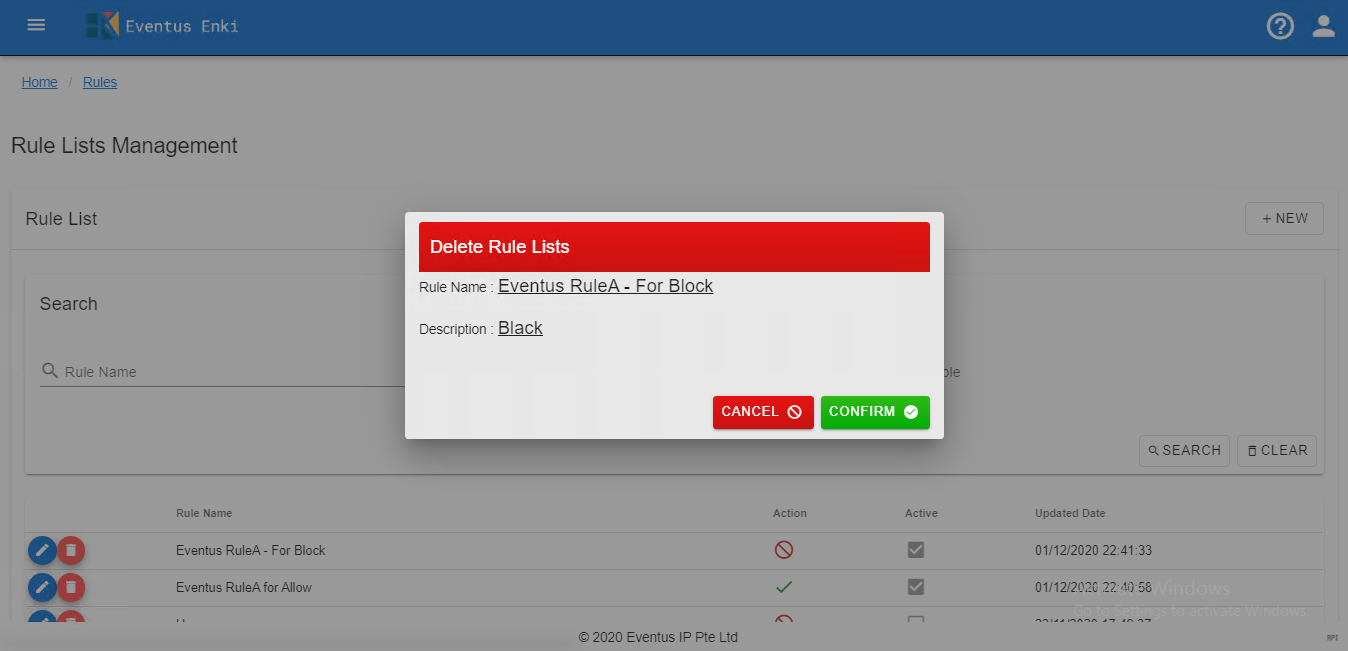
3. Click Confirm to delete
Click Cancel to discard change and go back to list
# Reports Management
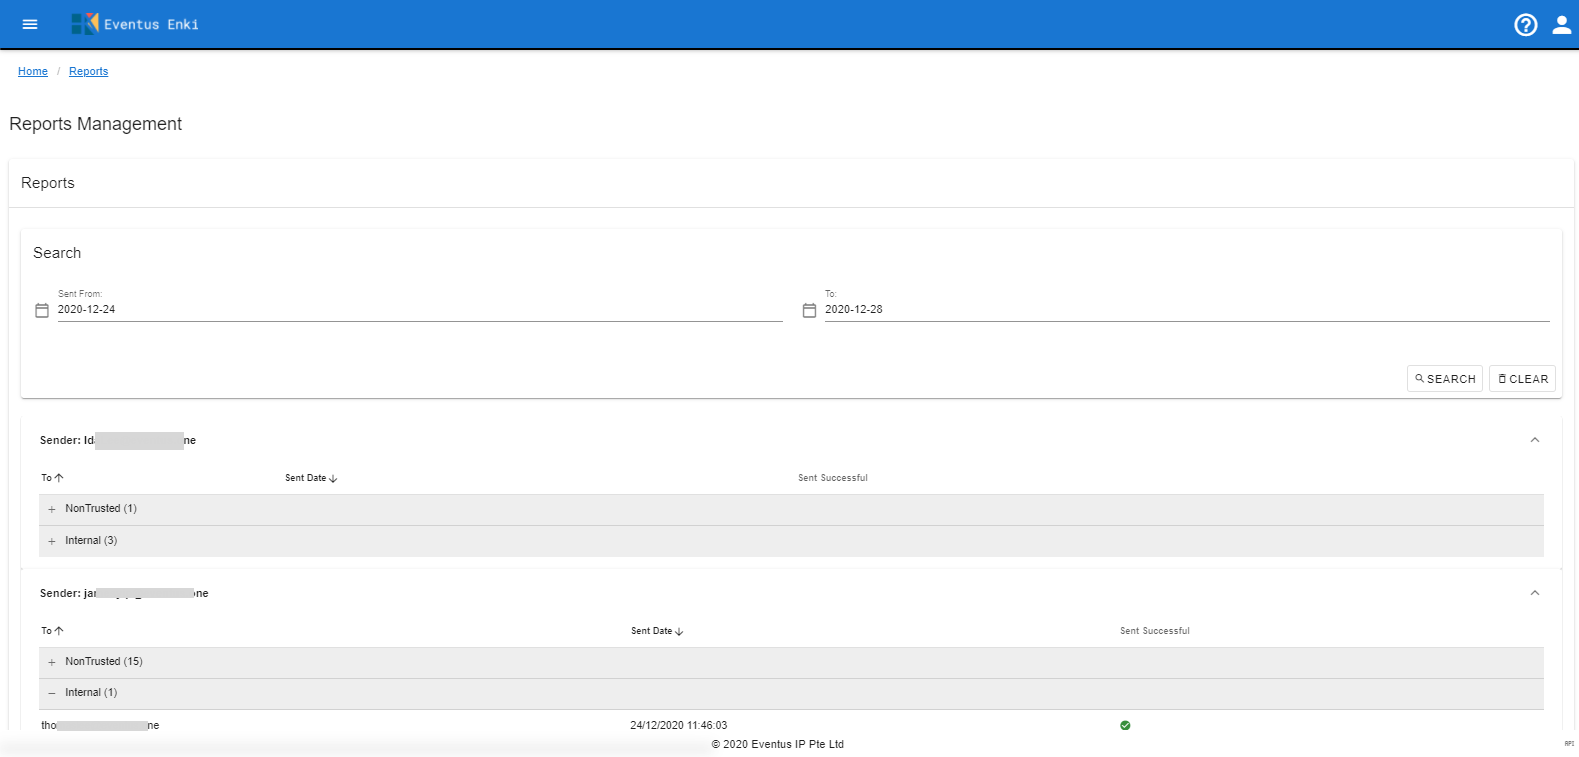
This is for listing who and how many mails checked, include Trusted、NonTructed、Internal and Blocked lists.
1. List Reports
1. Go to the Reports Management
2. Select the sent date reange and click Search button to get the lists.
# Global Setting
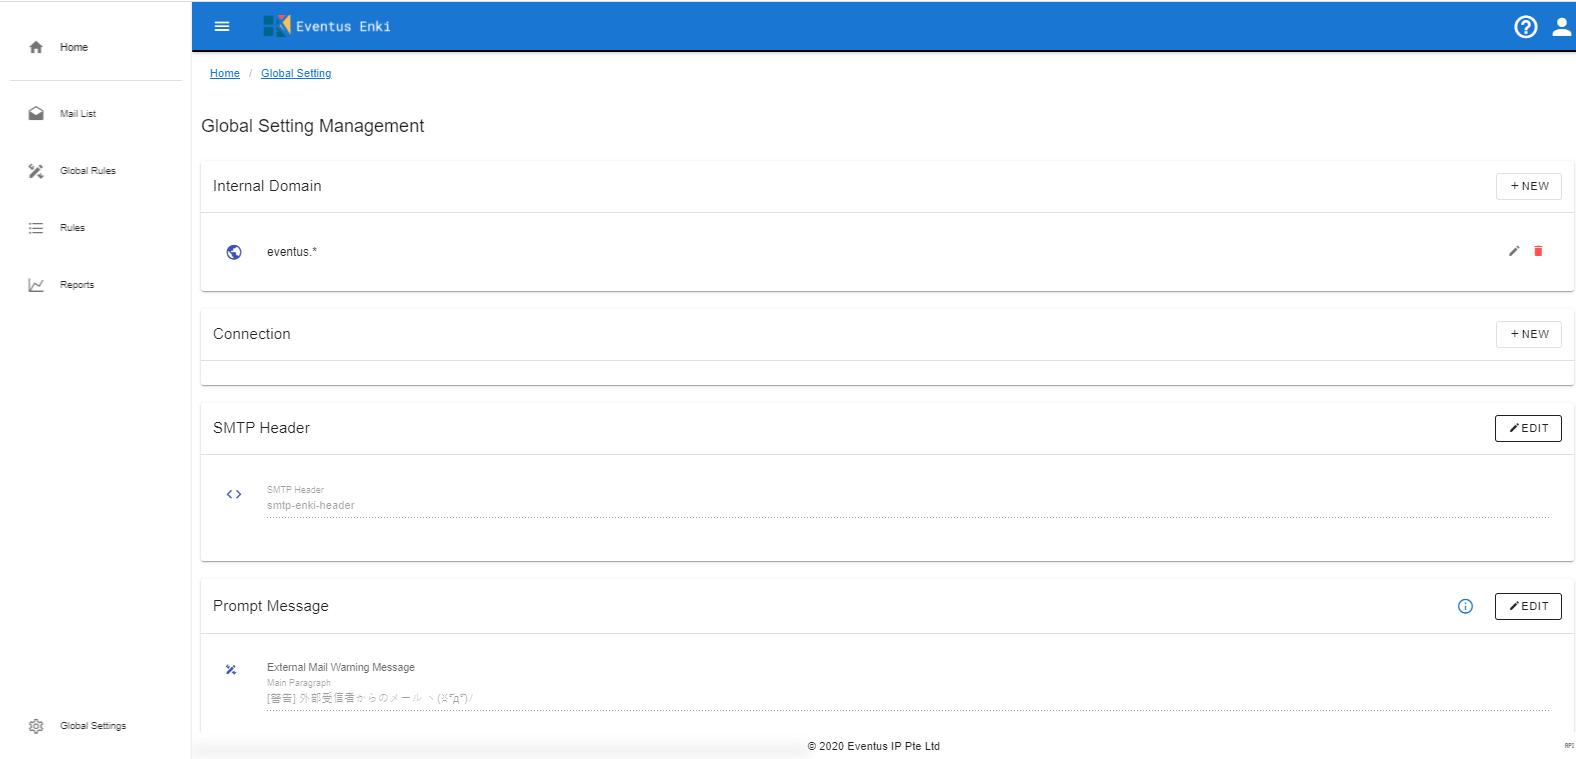
This is for setting "Internal Domain"、" AD Connection"、" SMTP Header"、" Prompt Message"、"Logo" and "Check Type".
# Internal Domain
1. Create Internal Domain
1. Go to the Global Setting and "Internal Domain" block
2. Click +NEW to create a new Internal Domain
3. Fill the "Internal Domain"
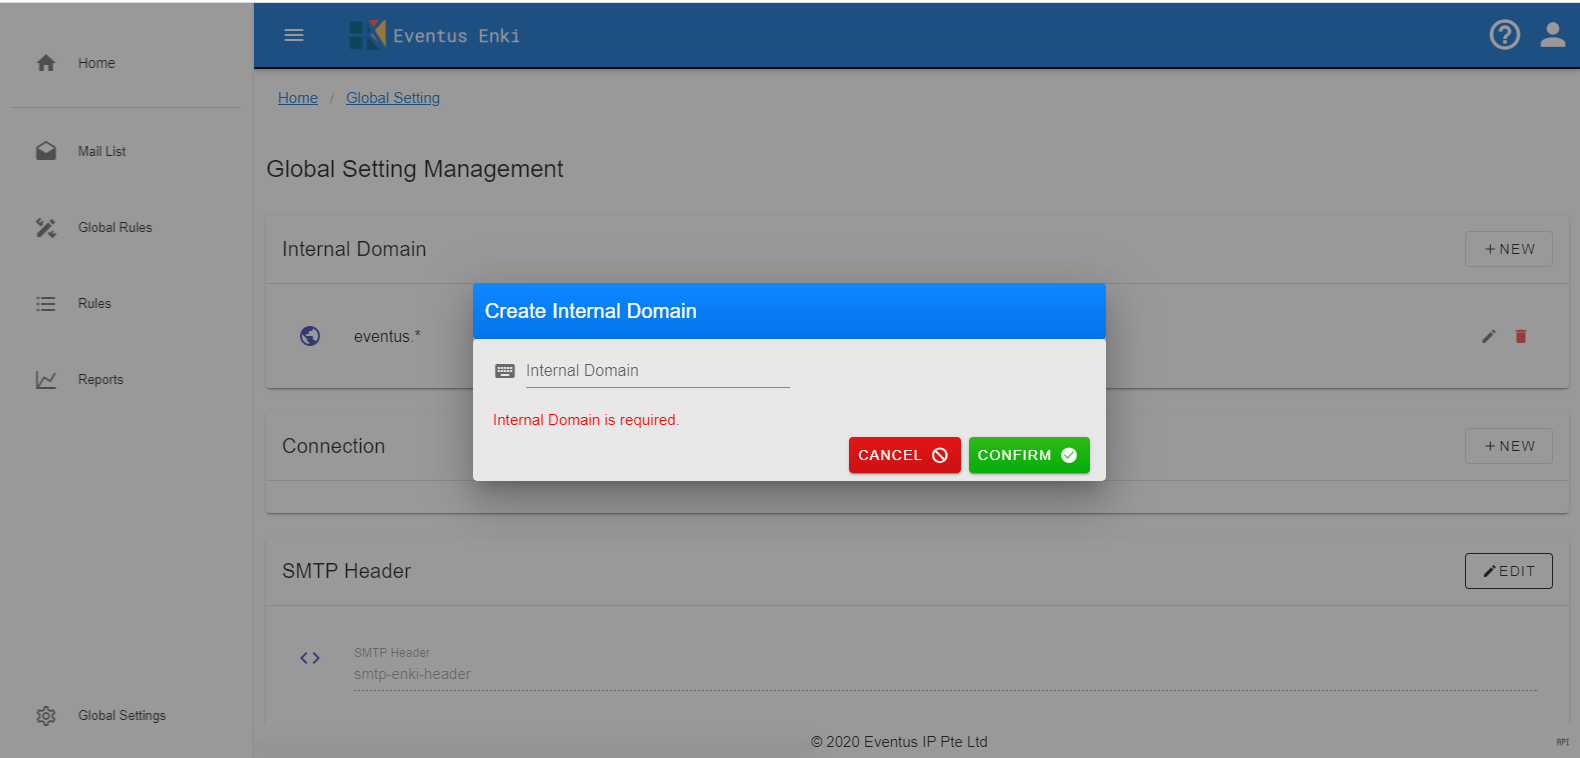
4. Click Confirm to add record
Click Cancel to discard change and go back
2. Modify Internal Domain
1. Go to the Global Setting and "Internal Domain" block
2. Click Pen icon to modify
3. Change the "Internal Domain"
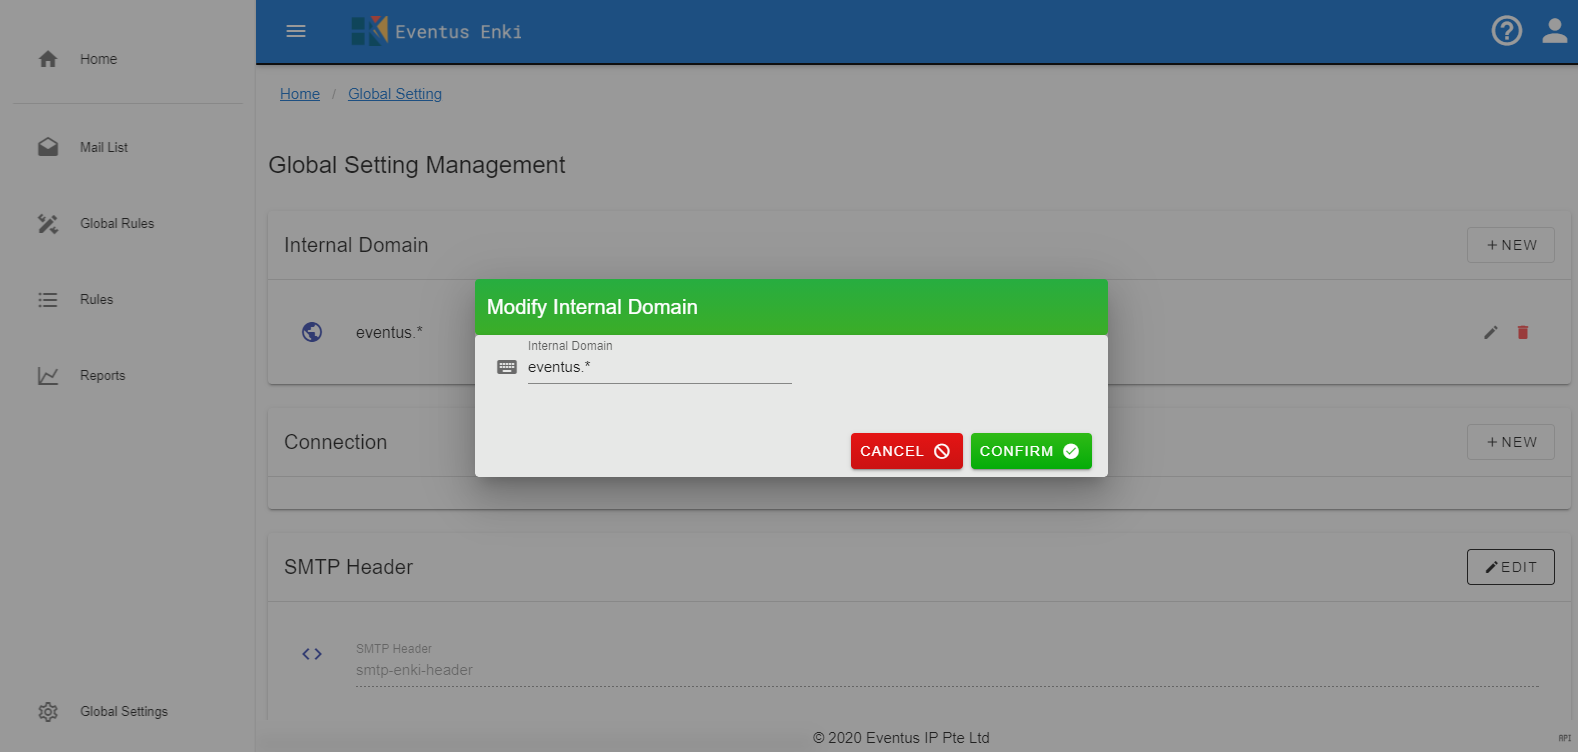
4. Click Confirm to modify record
Click Cancel to discard change and go back
3. Delete Internal Domain
1. Go to the Global Setting and "Internal Domain" block
2. Click Trash can icon to delete
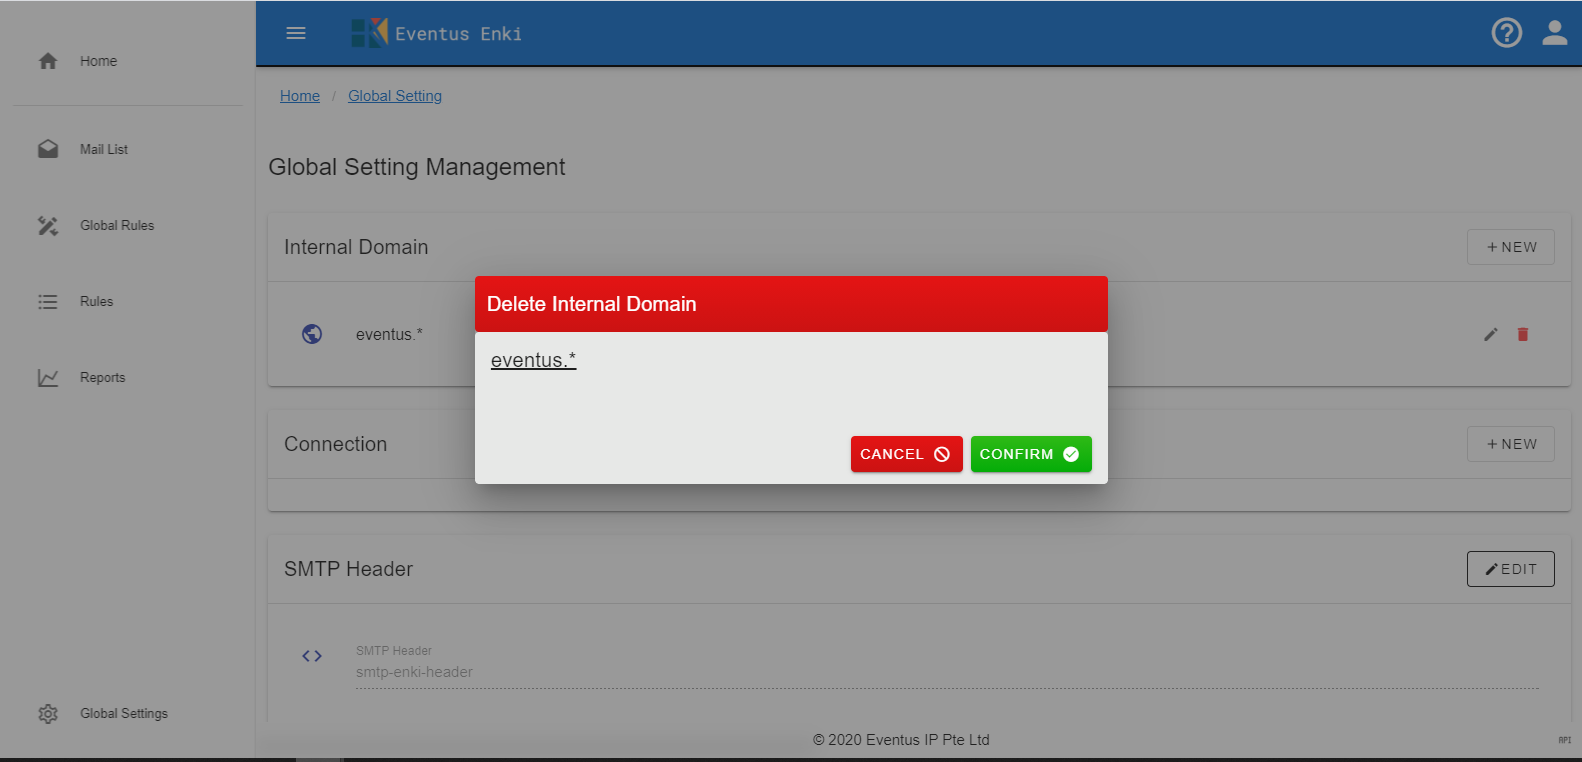
3. Click Confirm to modify record
Click Cancel to discard change and go back
# Connection
1. Create Connection
1. Go to the Global Setting and "Connection" block
2. Click +NEW to create a new Connection
3. Fill the "Server"、"Account" and "Password"
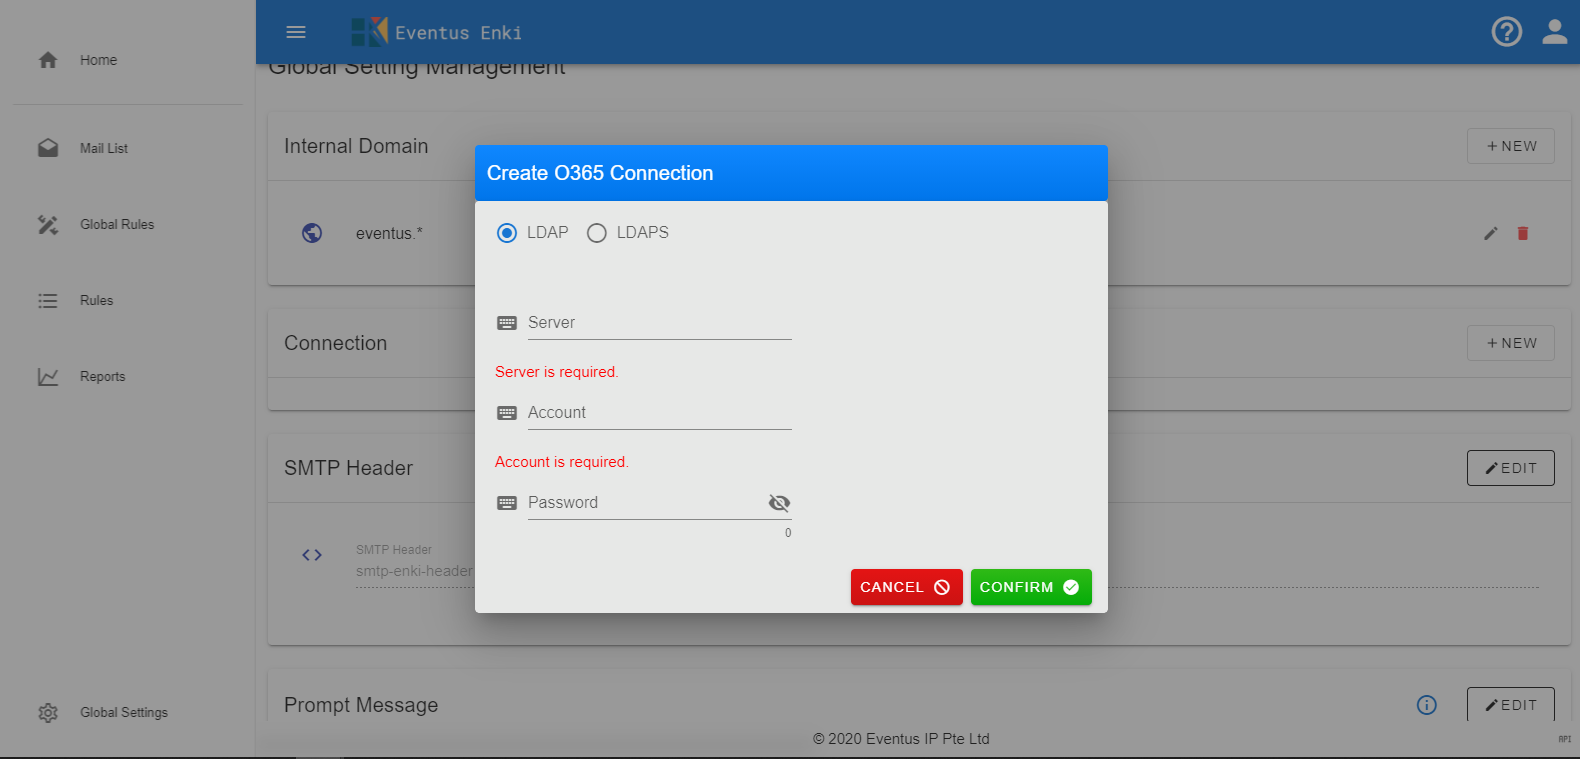
4. Click Confirm to add record
Click Cancel to discard change and go back
2. Modify Connection
1. Go to the Global Setting and "Connection" block
2. Click Pen icon to modify
3. Change the "Server"、"Account" and "Password"
if not change Password, please leave it blank.
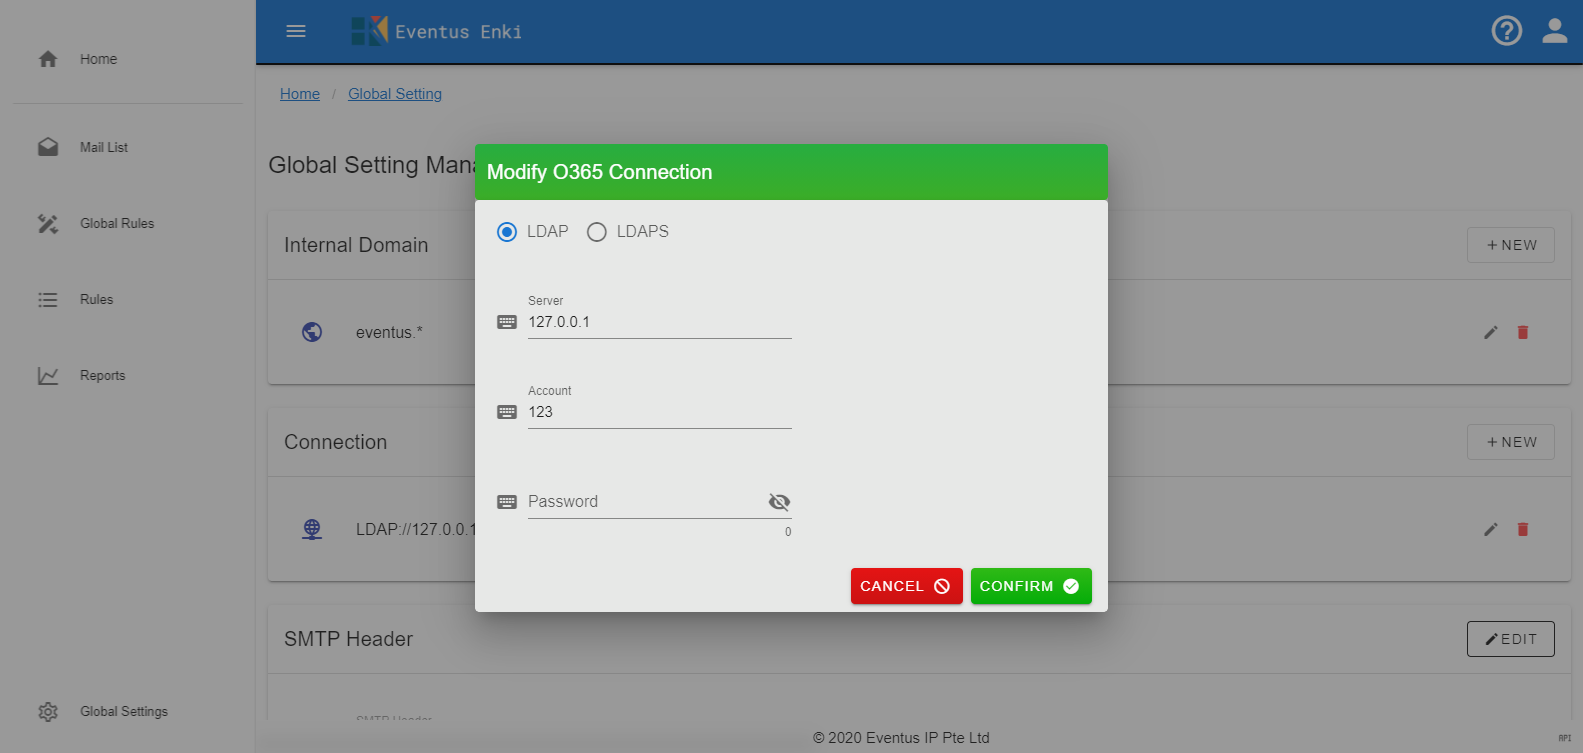
4. Click Confirm to modify record
Click Cancel to discard change and go back
3. Delete Connection
1. Go to the Global Setting and "Connection" block
2. Click Trash can icon to delete
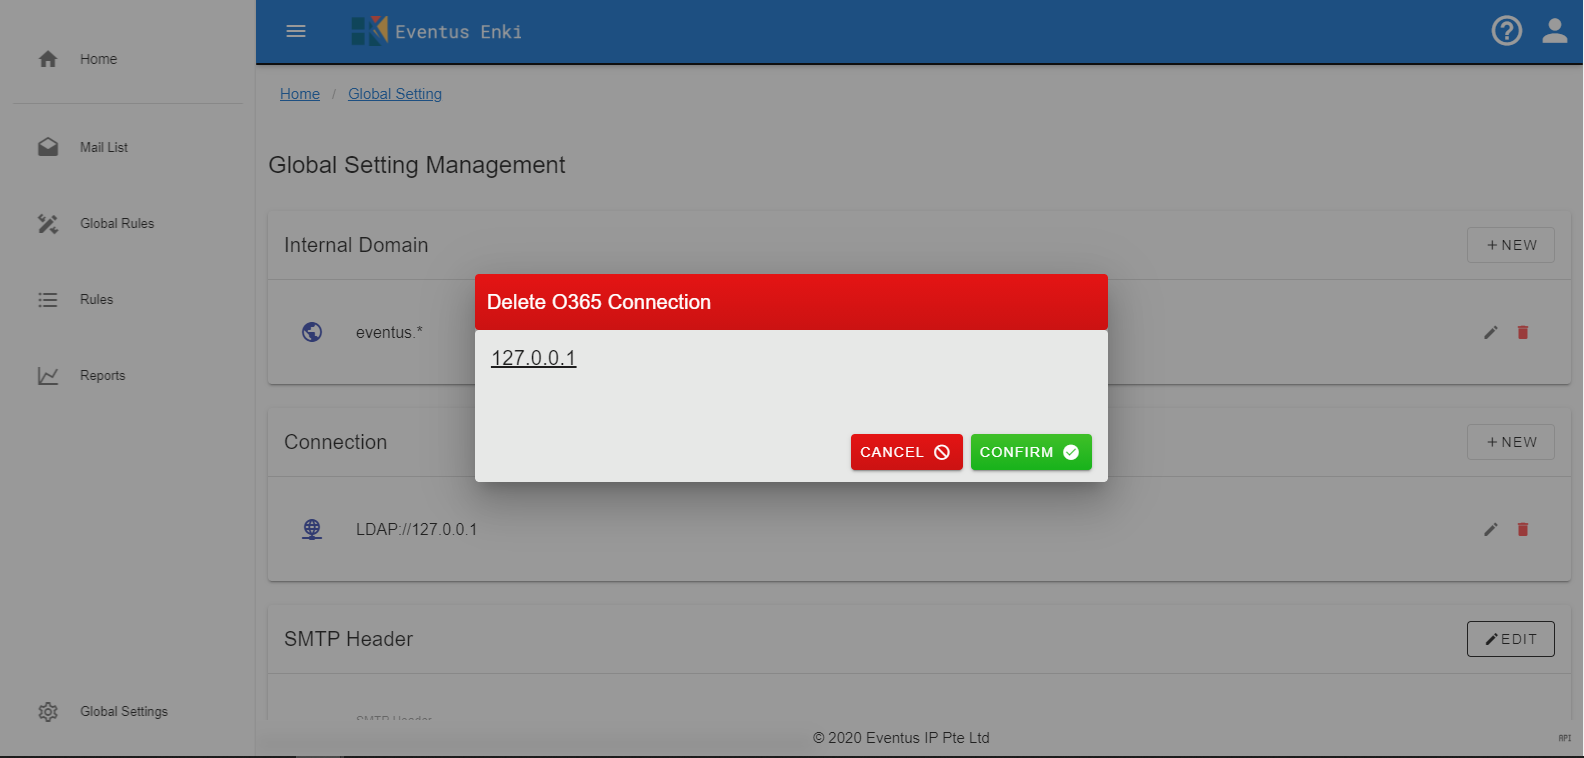
3. Click Confirm to modify record
Click Cancel to discard change and go back
# SMTP Header
1. Setting SMTP Header
1. Go to the Global Setting and "SMTP Header" block
2. Click Pen icon to setting
3. Fill the "SMTP Header".
SMTP Header should start with "x-" Only allow characters, numbers and -

4. Click Confirm to modify record
Click Cancel to discard change and go back
# Prompt Message
You can click info icon to check the Prompt rules.
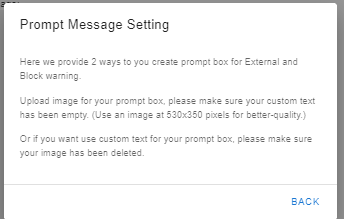
1. Setting Prompt Message
1. Go to the Global Setting and "Prompt Message" block
2. Click Pen icon to setting
3. Fill "Warning Message"、 "External Message"、" Blocklist Message" and upload/delete Images
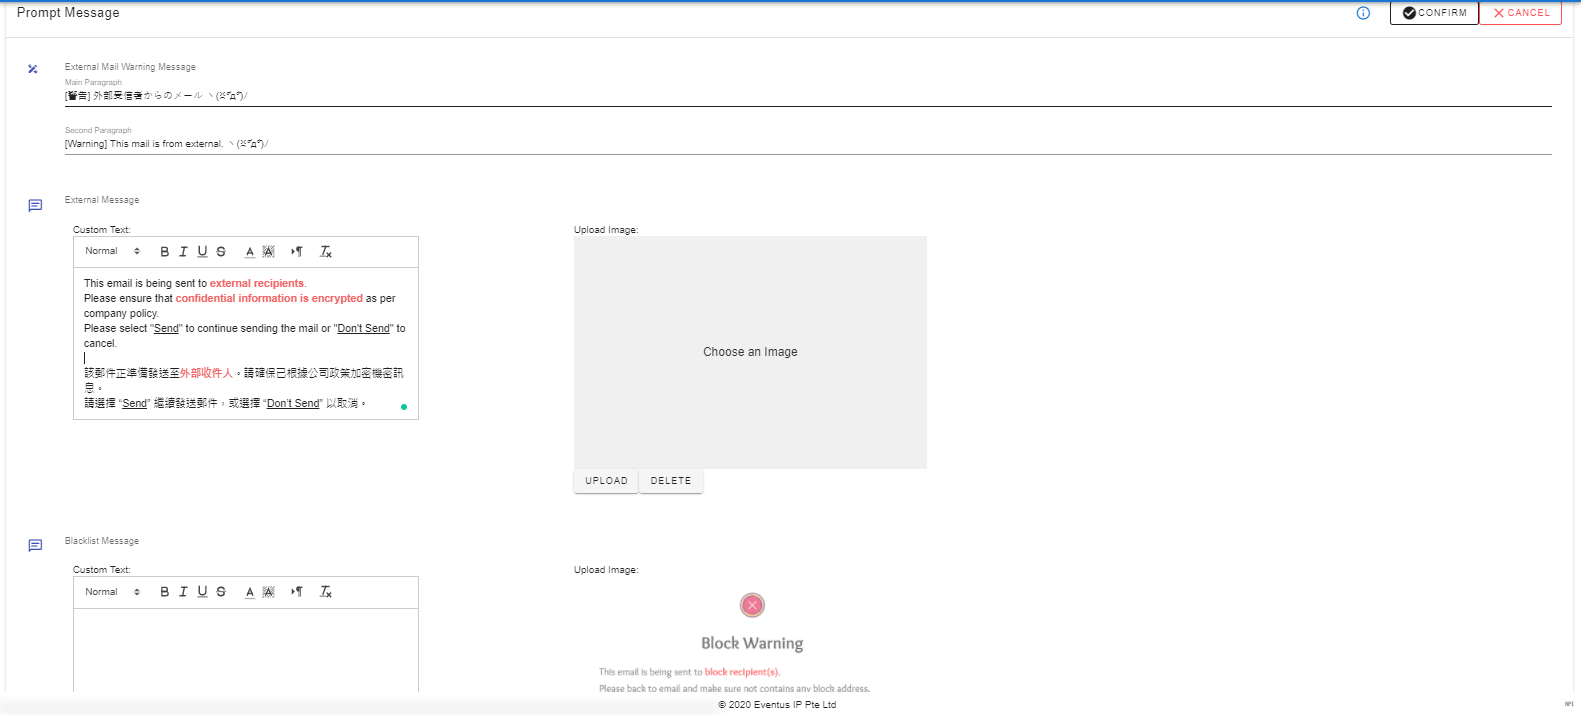
4. Click Confirm to modify record
Click Cancel to discard change and go back
# Logo
1. Setting Logo
1. Go to the Global Setting and "Logo" block
2. Click Pen icon to setting
3. Upload or delete image

4. Click Confirm to modify record
Click Cancel to discard change and go back
# Check Type
1. Setting Check Type
1. Go to the Global Setting and "SMTP Header" block
2. Click Pen to setting
3. Switch "External Check" or "Whitelist/Blocklist Check"

4. Click Confirm to modify record
Click Cancel to discard change and go back
# Account Setting
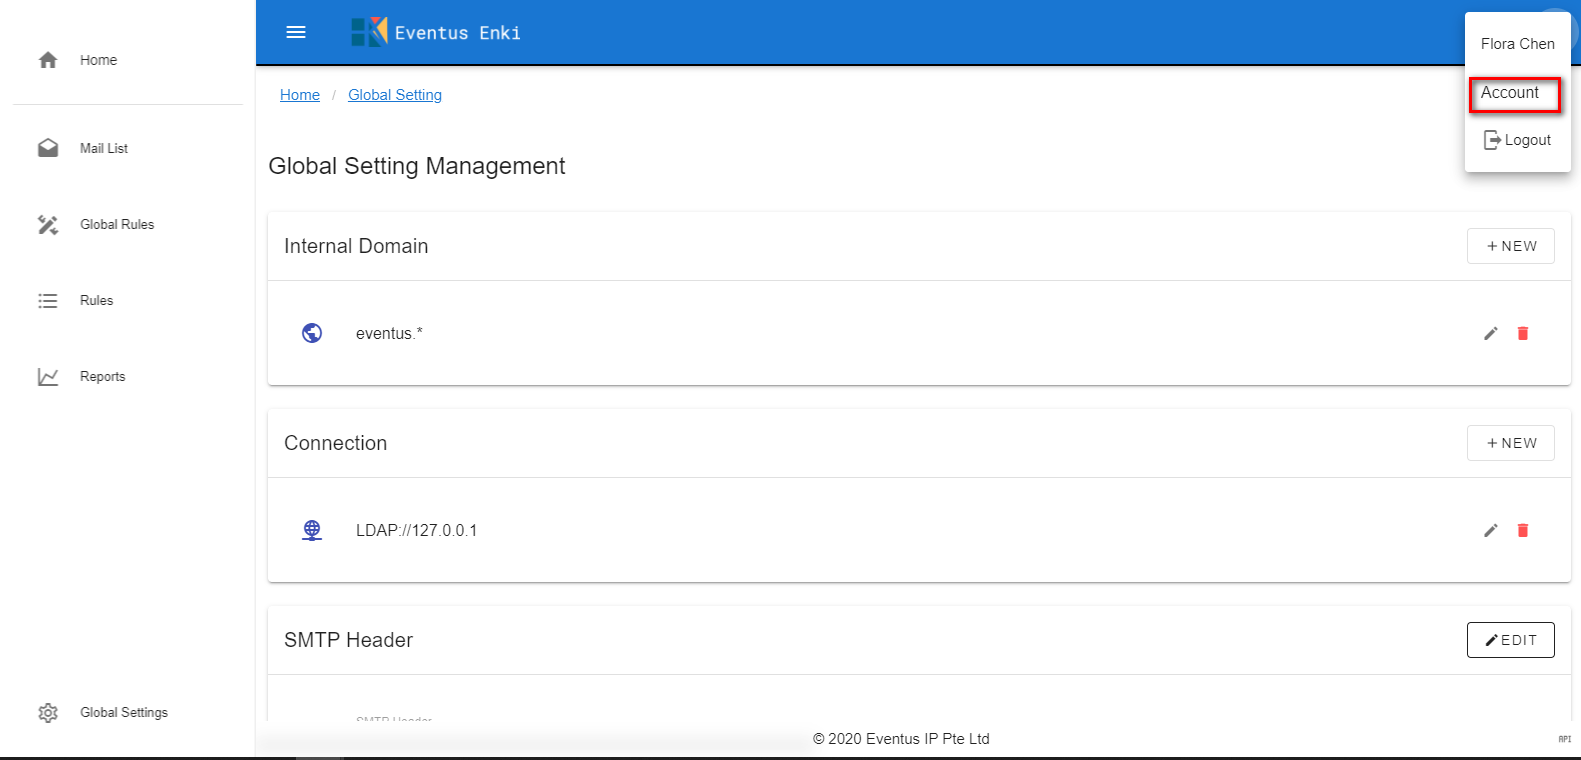
This is for setting Account information, include "Company Name"、"License" and "Authentication Type"
1. Go to Account setting
1. Click top right User icon
2. Click Account
2. Setting Account Information
1. Go to Account Setting
2. Fill "Company Name"、"License" and "Authentication Type"
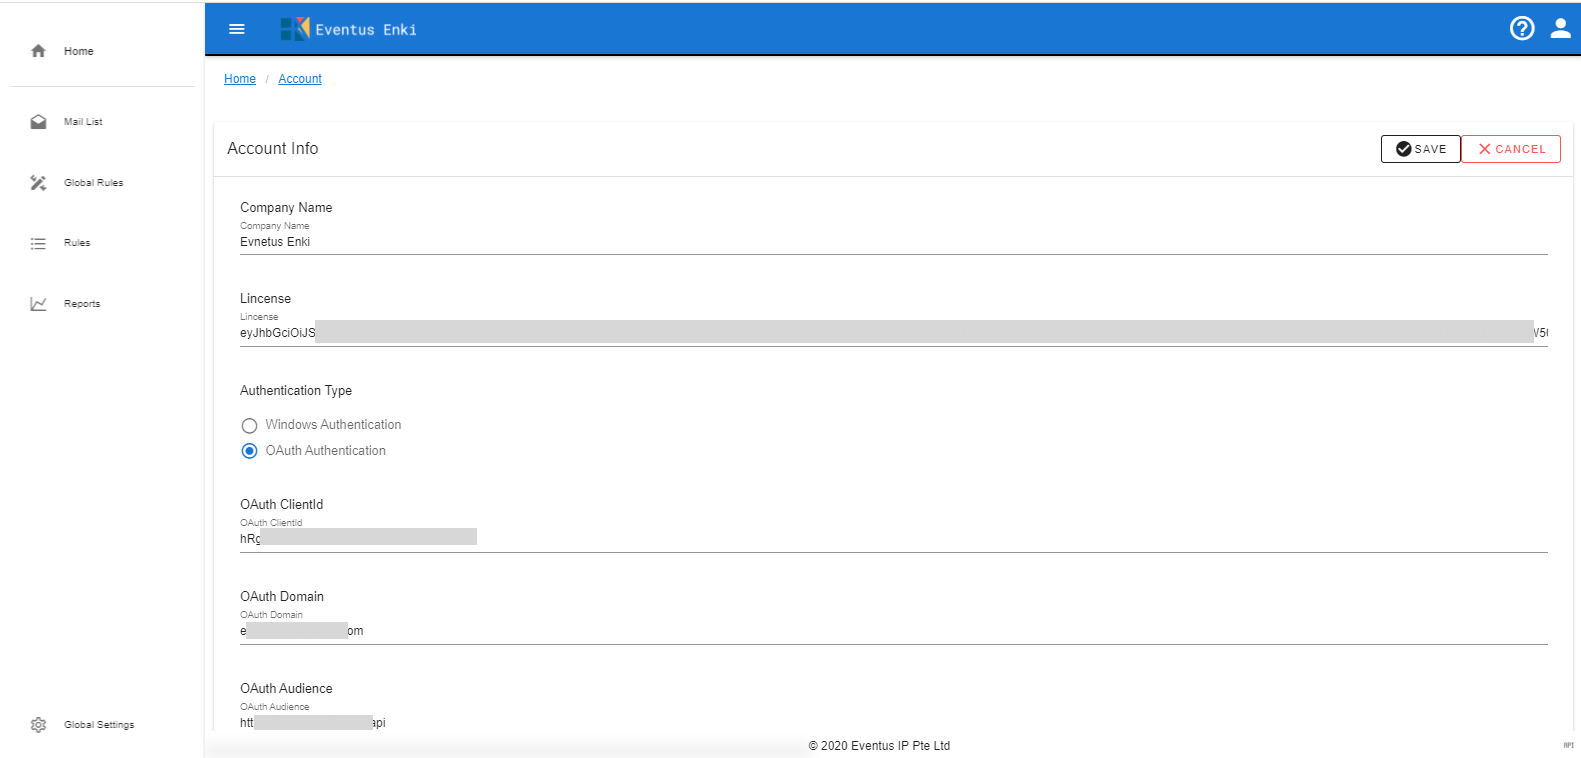
3. Click Save to modify record
Click Cancel to discard changes
